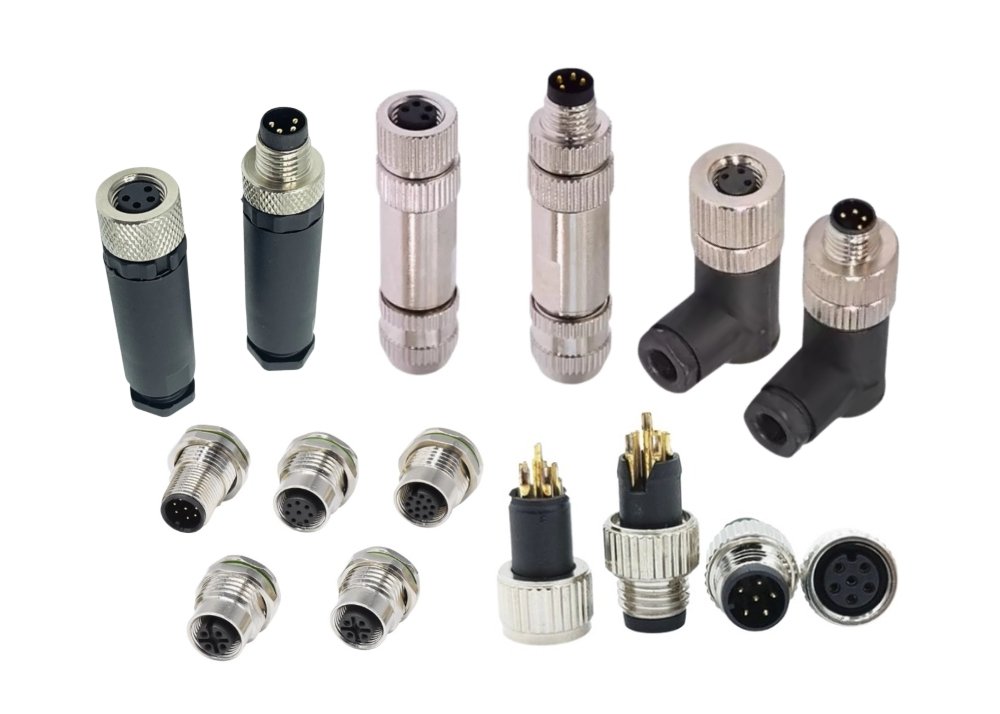
You want your structured cabling installation to deliver reliable network performance and a professional appearance. Proper cabling practices help you avoid signal loss, interference, and costly rework. Start with careful preparation and select the right installation method for your infrastructure. Use panel connectors like the M8 connector or Type B connector from a reputable connector factory. Organized cabling supports your network and structured cabling needs, ensuring a robust infrastructure for years to come.
Tip: Always double-check your cabling layout before securing any installation.
Essential Tools and Materials for Panel Connectors Installation
Selecting the right tools and materials is the foundation of a flawless cabling infrastructure. You need to prepare for every step, from mounting wallplates to terminating keystone connectors. Proper preparation ensures your cabling installation supports your network and delivers long-term reliability.
Must-Have Tools for Structured Cabling
You must gather essential tools before starting any cabling project. Each tool plays a specific role in the installation process, helping you achieve a professional finish and maintain the integrity of your cabling infrastructure.
| Tool Category | Examples of Tools Included |
|---|---|
| Hand Tools | Cable cutters, pliers, scissors & knives, screwdrivers |
| Low Voltage Tools | Bracket installation tools, cable installation tools, keystone jacks, test equipment |
| Network/IT Tools | Connectors & connector tools, crimping tools, punchdown tools, test equipment |
| Wall Box & Electrical Panel Tools | Wire strippers, cable slitters, adjustable wire strippers, cable cutters |
| Other | Alignment tools, force gauges |
| Tool Bags | Backpacks, cases, pouches |
Screwdrivers
You use screwdrivers to secure wallplates and panel connectors. Choose both flathead and Phillips types for versatility.
Drill and Bits
A drill with the correct bits allows you to create precise holes for mounting wallplates and brackets. This step is crucial for stable cabling components.
Level
A level helps you align wallplates and keystone components. Straight mounting ensures a professional appearance and prevents misalignment in your cabling infrastructure.
Stud Finder
You use a stud finder to locate studs and avoid obstacles. This tool protects your cabling and infrastructure from accidental damage.
Wire Strippers
Wire strippers remove insulation from ethernet cabling without harming the wires. Clean stripping is essential for reliable keystone terminations.
Measuring Tape
Measuring tape ensures accurate placement of wallplates and cabling components. Precise measurements prevent errors and support organized cabling.
Tip: Always test your ethernet cabling with a cable tester before finalizing the installation. This step verifies connectivity and pinout for keystone jacks and panel connectors.
Required Materials for Wallplate Mounting
You need high-quality materials to guarantee secure and durable wallplate mounting. Premium wallplates and face plates, made from robust steel or high-impact plastic, resist warping and provide a professional finish. The Single Gang Steel Drywall Bracket includes all necessary mounting hardware, making it suitable for both new and retrofit cabling installations. Universal Mounting Plate Kits offer reliable options for mounting various devices, using keyhole and ratchet clips for stability.
Wallplate
Wallplates serve as the visible interface for your cabling infrastructure. Select plates that match your keystone and panel connectors.
Panel Connectors
Panel connectors, including ethernet keystone jacks, provide the connection points for your cabling components. Choose connectors compatible with your cabling type.
Mounting Screws
Mounting screws secure wallplates and brackets to the wall. Use the correct size for your infrastructure to prevent loosening.
Anchors
Anchors add support when mounting wallplates on drywall or plaster. They help distribute weight and maintain cabling stability.
Electrical Box or Low-Voltage Mounting Bracket
Electrical boxes and low-voltage mounting brackets house your cabling components. These items protect your cabling and support organized installation.
Cable Ties, Cable Clips, Wire Sleeves
Cable ties, clips, and wire sleeves organize ethernet cabling behind wallplates. These components prevent tangling and support neat cabling management.
Safety Gear for Installation
Safety is critical during cabling installation. You must protect yourself and your infrastructure from hazards.
Safety Glasses
Wear safety glasses to shield your eyes from dust and debris during drilling and cabling work.
Gloves
Gloves protect your hands when handling sharp cabling components and tools. They also improve grip and reduce the risk of injury.
Preparing for Structured Cabling Installation
Before you begin any structured cabling installation, you need to prepare your workspace and plan your approach. Careful preparation ensures your cabling project runs smoothly and delivers reliable results. You will avoid costly mistakes and ensure your panel connectors and wallplates fit perfectly.
Assessing the Wall for Panel Connectors
Identifying Wall Type (drywall, plaster, wood, metal)
Start by identifying the type of wall where you plan to install your cabling. Drywall is common in modern buildings, while older structures may use plaster. You might also encounter wood paneling or metal surfaces in some environments. Each wall type requires a different approach for mounting wallplates and routing cabling. Drywall allows for easy cutting and mounting, but plaster can crack if you do not use the right tools. Wood and metal may need specialized anchors or brackets to support your structured cabling.
Locating Studs and Obstacles
Use a stud finder to locate studs behind the wall. Studs provide solid support for mounting wallplates and panel connectors. Avoid placing cabling where you find obstacles like pipes, electrical wires, or ductwork. Mark these locations clearly so you do not accidentally drill into them. Careful assessment at this stage prevents damage and ensures your structured cabling installation remains safe and efficient.
Marking Placement for Wallplate Installation
Measuring for Alignment
Accurate measurements are essential for a professional finish. Use a measuring tape to determine the exact height and position for your wallplate. Plan and mark all node locations before you start the installation. This step keeps your cabling organized and efficient. Measure and document cable lengths to avoid excess slack or tension, which can affect performance. Double-check your measurements before you cut any openings in the wall.
Marking Drill Points
After measuring, mark your drill points with a pencil. Use a level to ensure your marks are straight. Label both ends of each cable and the corresponding ports on patch panels and wallplates. This practice creates a clear network map and simplifies future troubleshooting. When routing cabling through walls or ceilings, use tools like fish tape carefully. Avoid stretching or pinching cables, as this can degrade performance. Use low-voltage mounting brackets to secure and neatly install wallplates.
Tip: Label cables during installation to make future maintenance easier and faster.
Ensuring Safety During Cabling
Power Off Precautions
Safety must always come first in any low-voltage structured cabling project. Turn off power before you begin work to avoid electrical hazards. Wear personal protective equipment such as safety glasses and gloves. Use voltage testers to confirm that circuits are not live. Follow lockout/tagout procedures to secure electrical sources and prevent accidental activation.
Checking for Wires and Pipes
Inspect the area for hidden wires and pipes before you drill or cut. Avoid working in wet areas and stay clear of overhead power lines. Use ground fault circuit interrupters (GFCIs) as a failsafe. Maintain good housekeeping by cleaning spills and securing cords to prevent slips and trips. Always test and verify all connections are secure and safe when you finish your cabling installation.
Note: Follow OSHA regulations and comply with the National Electrical Code (NEC) for all structured cabling work. Proper training and adherence to safety standards protect you and your infrastructure.
Wallplate Installation Methods for Structured Cabling
Choosing the right wallplate installation method ensures your structured cabling project meets both functional and aesthetic requirements. You must consider the environment, available space, and device needs before selecting a mounting style. Below, you will find the most common methods for mounting wallplates and panel connectors.
Surface Mount Panel Connectors
Overview
Surface mount panel connectors offer a practical solution when you cannot use traditional wall outlets. You attach these connectors directly to surfaces, such as walls, desks, or even glass partitions. This method keeps your cabling accessible and organized, especially in challenging environments.
Pros and Cons
| Pros | Cons |
|---|---|
| Quick and easy installation | May appear bulkier than flush mounts |
| No need to cut into walls | Can be more exposed to accidental damage |
| Ideal for temporary setups | May not suit all décor styles |
| Flexible placement options | Limited concealment of cables |
When to Use
You should use surface mount panel connectors in the following scenarios:
- Traditional wall outlet faceplates and jacks are impractical, such as when mounting devices to back boxes with concealed threaded holes.
- Tight spaces do not allow room for a short patch cord between a jack and the device port.
- Devices, like room scheduler touchscreens, mount on glass mullions without wall cavities, making electrical boxes unnecessary.
- Ceiling-mounted wireless access points benefit from simplified installation, as you can avoid complex assemblies with biscuit boxes and jacks.
- You want to reduce installation complexity by coiling cables inside back boxes, as long as you respect cable bend radius and connector length.
- You need a flexible, vendor-independent cabling system that supports IoT devices and smart building sensors.
Tip: Surface mount solutions provide flexibility and simplify installation in modern, technology-rich environments.
Flush Mount Wallplate Installation
Overview
Flush mount wallplate installation creates a clean, professional look. You install the wallplate so it sits level with the wall surface. This method hides most of the cabling and hardware, giving your space a tidy appearance.
Pros and Cons
| Pros | Cons |
|---|---|
| Sleek, low-profile finish | Requires cutting into the wall |
| Protects connectors from damage | More time-consuming installation |
| Matches most interior designs | Not ideal for all wall types |
| Conceals cables and hardware | Harder to modify after installation |
When to Use
Choose flush mount installation when you want a seamless look and have access to the wall cavity. This method works best in new construction or major renovations, where you can plan for cable routing and wall modifications.
Retrofit Installation for Structured Cabling
Overview
Retrofit installation allows you to add structured cabling to existing spaces without major demolition. You use low-voltage mounting brackets or old work boxes to secure wallplates and connectors.
Pros and Cons
| Pros | Cons |
|---|---|
| Minimal disruption to finished walls | May require creative cable routing |
| Cost-effective for upgrades | Limited by existing wall structure |
| Quick to implement | May not support heavy or large devices |
| Suitable for most wall types | Sometimes less secure than new installs |
When to Use
Select retrofit installation when you need to upgrade or expand your network in finished spaces. This method works well for offices, schools, or homes where you want to avoid extensive wall repairs.
Step-by-Step Panel Connectors Wallplate Installation Process
Preparing the Wallplate and Cabling
Assembling Panel Connectors
You begin your structured cabling installation by assembling the panel connectors and preparing all necessary components. Manufacturers recommend a systematic approach to ensure every part fits and functions as intended. Follow these steps for a reliable setup:
- Select a suitable location for your network devices, such as servers and switches. Choose a private, central spot away from public areas to protect your infrastructure.
- Identify and mark the positions for network nodes. Measure the cable lengths needed from your server location to each node. This step helps you avoid excess slack and ensures efficient cabling.
- Gather all required hardware. You need data plugs, wall plates, panel connectors, ethernet keystone jacks, and tools like punch down and crimping tools.
- Turn off power in the installation area before you cut holes or position wall plates. Place wall plates in accessible spots that avoid electrical components.
- Run cables through walls with care. Avoid damaging existing infrastructure, especially in older buildings where you may need to cut through plaster or wood.
- Test installed cables using a network testing tool. Confirm that all connections are active and functional.
- Configure network devices and components after verifying the physical cabling and connections.
Tip: Careful planning and assembly of panel connectors and keystone components prevent costly mistakes and support long-term reliability.
Prepping Cables for Structured Cabling
You must prepare your cabling before mounting wallplates. Start by inspecting each cable for damage. Use wire strippers to remove insulation from ethernet cabling, exposing clean wires for keystone insertion and removal. Label both ends of every cable to simplify future maintenance and troubleshooting. Organize cables using cable ties and clips to prevent tangling behind wallplates. Measure cable lengths accurately to avoid tension or slack, which can affect network performance. Always test cables with a cable tester before proceeding to the next step.
Mounting the Wallplate for Panel Connectors
Drilling Holes
You need to drill precise holes for mounting wallplates and panel connectors. Use a measuring tape and level to mark drill points, ensuring straight alignment. Select the correct drill bit for your wall type—drywall, plaster, wood, or metal. Drill slowly to avoid damaging cabling or other components hidden behind the wall. Clean the area after drilling to remove dust and debris.
Securing with Screws and Anchors
After drilling, secure the wallplate using mounting screws and anchors. Anchors provide extra support, especially in drywall or plaster installations. Insert screws through the wallplate and into the anchors, tightening them until the wallplate sits flush and stable. Avoid over-tightening, which can crack the wallplate or strip the anchors. Check the stability of the installation by gently tugging on the wallplate.
Note: Use electrical boxes or low-voltage mounting brackets to house cabling components and protect your structured cabling installation.
Connecting Panel Connectors and Cabling
Attaching Cables to Connectors
You attach cables to panel connectors and keystone jacks using punch down or crimping tools. Ensure each wire seats firmly in its designated slot. Maintain controlled impedance throughout the connectors and cabling to protect signal integrity. Use high-quality RF connectors and materials to minimize signal loss and electromagnetic interference. Organize cables behind the wallplate, using cable ties and wire sleeves to keep everything neat.
- Protect signal integrity by using connectors with high isolation and effective EMI shielding.
- Minimize return loss by avoiding manufacturing imperfections and impedance discontinuities.
- Match impedance to reduce signal reflections and optimize network performance.
- Employ proper grounding and use ground planes near connectors for stable connections.
- Test connector performance with tools like Time Domain Reflectometry (TDR) and Bit Error Rate Testing (BERT).
Tip: Collaborate with component suppliers and PCB manufacturers to ensure design compatibility and maintain continuous signal paths.
Testing Connections for Structured Cabling
You must test all connections after completing the installation. Use a cable tester to verify continuity and check for wiring faults such as shorts, opens, reversed pairs, and crosstalk. Measure signal attenuation to assess loss over cable length. Validate bandwidth using cable analyzers to confirm your cabling meets speed and noise tolerance standards for ethernet and structured cabling. Perform a visual inspection for physical damage. Connect the tester to both ends of each cable and interpret results to identify faults. Troubleshoot and correct any issues before finalizing the installation. Document all test results for future reference and maintenance.
- Line testing verifies correct cable pathways and checks for discontinuities.
- Bandwidth validation ensures compliance with standards like Cat 5e and Cat 6.
- Third-party certification provides independent validation and warranties for your structured cabling installation.
Note: Thorough testing guarantees your network operates reliably and supports all connected devices.
Final Securing of Wallplate Installation
Tightening Screws
You must pay close attention when tightening screws during wallplate installation. Proper tightening ensures the wallplate remains secure and stable over time. Begin by using a screwdriver that matches the screw head type. Place each screw into its designated hole and turn it slowly. Avoid using excessive force, which can crack the wallplate or strip the anchor.
Tip: Tighten screws until the wallplate sits flush against the wall, but stop if you feel resistance that could damage the material.
For installations on drywall or plaster, use anchors to distribute the load and prevent loosening. In seismic regions or areas with high lateral forces, plate washers help distribute pressure and protect the sill plate from splitting. Always check that anchor bolts have a minimum diameter of ½ inch and are spaced no more than 6 feet apart. For buildings with more than two stories, reduce spacing to a maximum of 4 feet to address increased forces.
You should embed anchor bolts at least 7 inches into the concrete foundation for optimal stability. Tighten nuts and washers firmly to secure the sill plate. If you work in a seismic zone, follow additional requirements such as using plate washers and proper bolt spacing near plate ends.
Checking Stability
After tightening all screws, you need to check the stability of your wallplate installation. Gently tug on the wallplate to ensure it does not move or shift. Inspect each screw and anchor for signs of loosening or damage. If you notice any instability, re-tighten the screws or replace the anchors as needed.
Use the following checklist to confirm a stable installation:
- Wallplate sits flush against the wall.
- Screws and anchors hold firmly without movement.
- No visible cracks or splits in the wallplate or surrounding material.
- Anchor bolts meet minimum edge distance requirements (typically 1¾ inches) to prevent splitting under load.
- All nuts and washers are properly tightened.
| Stability Checkpoint | Pass/Fail | Notes |
|---|---|---|
| Wallplate flush with wall | ||
| Screws/anchors secure | ||
| No cracks or splits | ||
| Proper anchor bolt spacing | ||
| Nuts/washers tightened |
Note: Protect sill plates against decay and termites as required by building codes. For short walls connecting braced wall panels, follow exceptions that allow reduced anchor bolt requirements but still ensure connection to adjacent braced walls.
You must always follow proper installation methods for anchor bolts. Wet-set installation, where bolts are placed in wet concrete, provides optimal embedment. If you use post-pour installation, ensure concrete vibration for full contact. These steps guarantee long-term durability and resilience for your structured cabling infrastructure.
Best Practices for Flawless Structured Cabling Installation
Cable Management for Panel Connectors
Organizing Cables Behind Wallplate
You achieve a professional cabling installation by organizing cables behind each wallplate. Plan cable paths with care to minimize bends and maintain a neat appearance. Dedicated conduits or trays help you segregate cable types, which supports both network performance and structured cabling standards. Always keep power and data cables separate to prevent electromagnetic interference. Use standardized color-coding systems for easy cable identification. Attach durable labels at both ends of every ethernet cable and at key junctions. Maintain comprehensive documentation, including routing diagrams and connection points, to support future scalability and troubleshooting. Schedule regular inspections to identify wear or damage in your cabling infrastructure.
Using Cable Ties, Clips, and Wire Sleeves
You use cable ties, clips, and wire sleeves to secure and organize cables behind wallplates. Select Velcro ties for easy insertion and removal during maintenance. Avoid over-tightening ties, which can damage ethernet cables and reduce performance. Cable clips keep keystone and panel connector cables in place, preventing tangling and supporting airflow. Wire sleeves bundle multiple cables, creating a tidy appearance and protecting against abrasion. Always follow minimum bend radius requirements, especially for Cat6A ethernet cabling, to avoid signal degradation. Plan cable pathways with at least 30% spare capacity to accommodate future scalability and prevent overcrowding.
Tip: Implement cable management best practices by using horizontal and vertical cable managers in racks, such as D-ring managers and waterfall guides, to maintain bend radius and separate cable types.
Alignment and Leveling in Wallplate Installation
Ensuring Straight Mounting
You ensure straight mounting by using a level and measuring tape before securing wallplates. Mark drill points with precision to align keystone connectors and panel connectors. Straight mounting not only improves the appearance of your structured cabling installation but also supports reliable network performance. Misaligned wallplates can cause stress on cables and connectors, leading to premature wear or signal loss.
Adjusting for Perfection
After mounting, you check alignment and make adjustments as needed. Loosen screws slightly to reposition the wallplate, then retighten for a secure fit. Confirm that all keystone connectors sit flush and that the wallplate does not shift when you insert or remove cables. This attention to detail ensures your cabling infrastructure remains stable and supports long-term network reliability.
Avoiding Common Cabling Mistakes
Over-tightening Screws
You avoid over-tightening screws during wallplate installation. Excessive force can crack wallplates, strip anchors, or damage keystone connectors. Tighten screws until the wallplate sits flush, but stop if you feel resistance. This practice protects your structured cabling and maintains the integrity of your network infrastructure.
Skipping Safety Steps
You never skip safety steps during cabling installation. Always power off equipment before working on ethernet or keystone connections. Use safety glasses and gloves to protect yourself. Beginners often overlook basic checks, such as verifying that all cables connect to the correct ports and that devices have power. Lack of planning or skipping documentation can lead to logical miswiring, such as connecting both ends of a patch cable to the same switch or missing a router connection. Use cable testers to verify connections and check for proper insertion and removal of keystone jacks. Regularly update your documentation to support future maintenance and performance.
Note: Careful planning, attention to detail, and adherence to safety protocols help you avoid the most frequent cabling mistakes and ensure a robust, scalable network infrastructure.
Ensuring Durability in Structured Cabling
Using Quality Materials
You strengthen the durability of your structured cabling by selecting materials that meet industry standards and support long-term network performance. High-quality components protect your infrastructure from wear, corrosion, and environmental stress. Industry experts emphasize that using certified materials from reputable manufacturers ensures your cabling installation remains reliable and safe. Counterfeit or noncompliant parts can compromise network performance and threaten the integrity of your structured cabling.
The following table highlights proven materials that enhance the durability of structured cabling installations:
| Material Type | Examples | Durability Features | Typical Applications |
|---|---|---|---|
| Metals | Titanium, Magnesium alloys, Galvanized steel, Stainless steel | High strength, corrosion resistance, wear resistance, impact resistance | Fasteners, structural supports, enclosures, cable trays |
| Polymers | HDPE, TPE, PTFE, Silicone, Polyurethane | Chemical resistance, flexibility, heat resistance, abrasion resistance | Cable jackets, insulation, seals, protective coatings |
| Reinforcements | Kevlar, Carbon fiber | High tensile strength, impact resistance, rigidity | Cable reinforcement, structural components |
| Protective Coatings | Epoxy, Acrylic, Polyurethane | Chemical resistance, abrasion resistance, UV resistance | Protective layers on cables, enclosures, structural parts |
| Shielding Materials | Aluminum foil, Braided aluminum wires | EMI shielding, corrosion resistance | High-frequency data cables, coaxial cables |
| Other Protective Materials | Rubber gaskets, Nylon jackets, Lead sheathing | Sealing, abrasion resistance, moisture and corrosion protection | Sealing enclosures, industrial and outdoor cables |
You improve network performance and simplify future upgrades by choosing materials that resist environmental hazards and mechanical stress. Polymers such as HDPE and PTFE provide flexibility and heat resistance for ethernet cable jackets, while metals like galvanized steel offer robust support for cable trays and enclosures. Shielding materials, including aluminum foil, protect high-speed data transmission from electromagnetic interference. When you use these materials, you ensure your structured cabling supports both current needs and future scalability.
Tip: Always verify that your cabling components pass rigorous certification tests and comply with installation standards. This practice reduces the risk of failure and supports reliable network performance.
Regular Maintenance Tips
You maintain the durability and performance of your structured cabling by following a proactive maintenance routine. Regular inspections and cleaning help you identify issues before they affect your network infrastructure. Use these best practices to extend the lifespan of your panel connector wallplate installations:
- Monitor patch panels and wallplates for signs of wear. Ensure all connections remain closed and secure.
- Clean panels and connectors frequently to prevent dust buildup, which can degrade performance.
- Avoid overloading cables. Excessive stress can damage ethernet cabling and reduce network reliability.
- Label all ports and cables accurately. Quick identification simplifies network upgrades and troubleshooting.
- Keep your cabling infrastructure in a controlled environment. Limit exposure to heat and humidity to preserve performance.
- Organize cables with management bars, ties, or Velcro straps. Prevent tangling and reduce stress on connectors.
- Secure cables loosely to avoid tension. Strain relief techniques prevent twisting and yanking, which extends the life of your structured cabling.
- Inspect keystone jacks and couplers for corrosion or damage. Clean connections to maintain optimal signal transmission.
- Maintain proper grounding and shielding. Isolated ground jacks and grounding lugs help reduce electrical interference and support high-speed data transmission.
- Prototype panel designs before full production. Verify fit and usability to prevent future issues and support future scalability.
Note: Consistent maintenance not only preserves network performance but also simplifies network upgrades and supports the long-term reliability of your structured cabling infrastructure.
Troubleshooting Panel Connectors and Structured Cabling Installation
Common Installation Issues
When you work on structured cabling, you may encounter several common problems. Recognizing these issues early helps you maintain a reliable network and prevents connection failures.
Loose Wallplate
A loose wallplate often results from improper screw tightening or missing anchors. If you notice movement when plugging in cables, you should address it immediately. Loose wallplates can damage connectors and disrupt cabling stability.
Misaligned Panel Connectors
Misaligned panel connectors make it difficult to insert cables and can cause strain on your structured cabling. You might see this issue if you skip using a level or rush the installation. Misalignment can also lead to poor connections and signal loss.
Cable Connection Problems
Cable connection problems can stem from several sources:
- Using hand-terminated RJ45 connectors with solid copper Ethernet cables increases the risk of breakage.
- Inconsistent or complex labeling schemes create confusion during troubleshooting.
- Directly labeling cable jackets leads to unreadable labels over time.
- Codes on faceplates and patch panels may lose meaning after network or office changes.
- Terminating solid core plenum cable directly into devices causes cable breakage and damages labels.
- Replacing or tracing cables becomes costly and time-consuming without proper documentation.
You can avoid many of these issues by using keystone jacks, factory-made patch cords, and maintaining clear, printed documentation in your network closet.
Quick Fixes for Cabling and Wallplate Problems
You can resolve most cabling and wallplate issues with a few targeted actions:
Re-securing Screws
- Check each screw for tightness. Use the correct screwdriver to avoid stripping.
- If the wallplate remains loose, install new anchors to provide better support.
- For seismic or high-traffic areas, use plate washers to distribute pressure.
Adjusting Placement
- Use a level to check alignment. Loosen screws slightly to reposition the wallplate or panel connectors.
- Retighten screws once you achieve proper alignment.
- If you find wiring errors, use a cable tester to check each wire individually.
- Employ a punchdown tool or toolless jack to terminate wires securely.
- Follow the correct wiring standard (T568A or T568B) and keep wire pairs twisted up to the termination point.
Tip: Consistent labeling and documentation make future upgrades and troubleshooting much easier.
Beginner Questions on Structured Cabling Installation
You may have questions as you start your structured cabling installation. Here are answers to some of the most common concerns:
What if my wall is uneven?
You can still install wallplates on uneven walls. Use adjustable mounting brackets or shims to create a flat surface. This approach ensures your cabling remains secure and your connections stay reliable.
Can I install on drywall or plaster?
Yes, you can install structured cabling on both drywall and plaster. Use appropriate anchors for each material. Drywall anchors provide strong support, while plaster may require toggle bolts or specialty anchors. Always check for hidden pipes or wires before drilling.
How do I know which panel connector to use?
Select panel connectors based on your cabling type and network requirements. Keystone jacks offer better mechanical design and higher category ratings than hand-terminated RJ45 plugs. Use factory-made patch cords with matching shielding and category for permanent links. Consult with a structured cabling professional if you need help choosing the right connector for your installation.
Note: Proper planning, quality materials, and regular inspections help your structured cabling support your network for years. Certification and documentation ensure your installation meets industry standards and prevents connection failures.
You can achieve flawless panel connector wallplate mounting in your cabling projects by following these essential steps:
- Prepare your workspace and ensure safety before starting any cabling task.
- Cut and strip cables to the correct length, arranging wires according to standards.
- Terminate and test each cabling connection for reliability.
- Secure wallplates and organize cabling for a professional finish.
- Label and document all cabling to simplify future maintenance.
Adopting best practices in cabling, such as careful planning, proper cable management, and thorough testing, ensures your installation meets industry standards. This guide helps you avoid common cabling mistakes and supports long-term network performance. You should always use quality materials and maintain clear documentation for every cabling project.
Double-check every cabling installation step. This habit prevents costly errors, extends the lifespan of your cabling, and guarantees a robust, scalable network.
FAQ
What tools do you need for panel connector wallplate mounting?
You need a screwdriver, drill, level, stud finder, wire strippers, and measuring tape. These tools help you achieve accurate placement and secure installation. Always use safety glasses and gloves to protect yourself during the process.
Can you install wallplates on uneven surfaces?
Yes, you can install wallplates on uneven walls. Use adjustable mounting brackets or shims to create a flat surface. This method ensures your connectors remain stable and your installation looks professional.
How do you choose the right panel connector?
Select a panel connector based on your cable type and network requirements. Keystone jacks work well for most structured cabling. Always match the connector category to your cable for optimal performance.
What should you do if a wallplate feels loose?
Check the screws and anchors. Tighten them with the correct tool. If the wallplate remains loose, replace the anchors or use larger ones for better support. A secure wallplate protects your connectors and cables.
How do you avoid damaging cables during installation?
Use wire strippers designed for your cable type. Avoid sharp bends and excessive pulling. Organize cables with ties and clips. Always follow the minimum bend radius for your cable category to prevent signal loss.
Is it safe to install structured cabling near electrical wiring?
Keep data cables separate from electrical wiring. Maintain at least 12 inches of separation to reduce electromagnetic interference. Use cable management systems to organize and protect your network cables.
How often should you inspect your structured cabling?
Inspect your cabling every six months. Look for signs of wear, loose connections, or dust buildup. Regular maintenance helps you catch problems early and keeps your network running smoothly.
Can you reuse wallplates and connectors for future upgrades?
You can reuse wallplates and connectors if they remain undamaged and meet your new network requirements. Inspect all components before reuse. Replace any worn or outdated parts to maintain network reliability.
Tip: Always label your cables and document your installation. This practice saves time during troubleshooting and future upgrades.